|
COMP1406 - Tutorial
#1
Simple
Java I/O and Data Objects
 |
 |
Description:
The purpose of this tutorial is to help you run a simple java program that collects keyboard input from the user and print it to the console. In addition you will create a simple java data object and use it in the code.
We will be demonstrating compiling individual .java code files
with JCreator. It is also possible to create projects and
project files with JCreator but we will simply compile the
individual .java files without
creating a project. That way, you are free to use IDE's (integerated
development environments) other than JCreator if you wish.
Instructions:
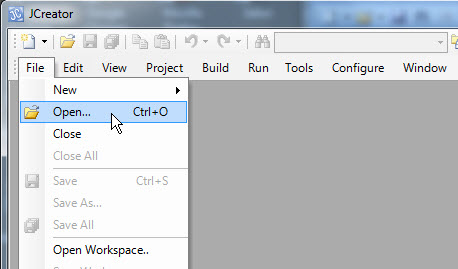
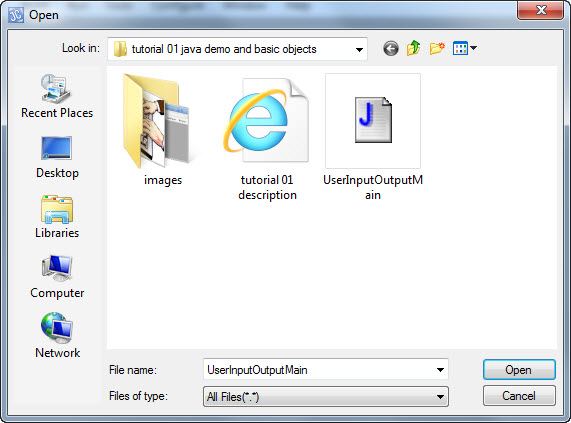
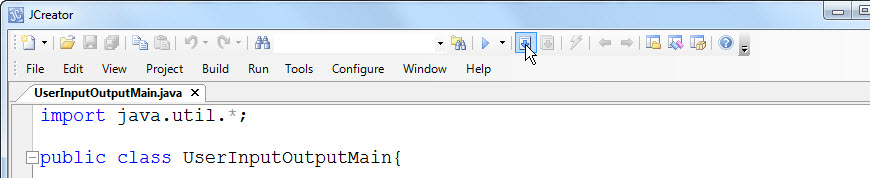
- Open up JCreator. Close the "Start Page" if it appears. Select File/Open as shown below
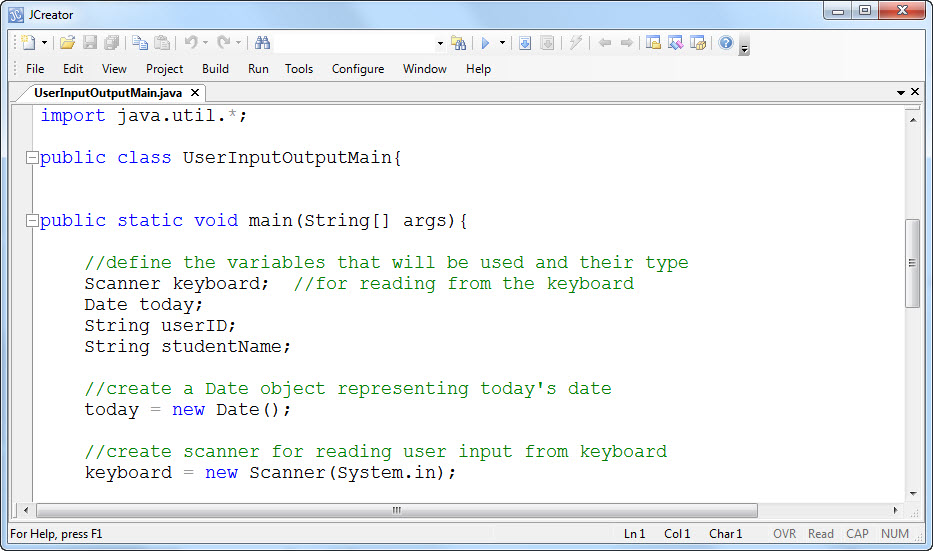
The file should open in JCreator as shown below.
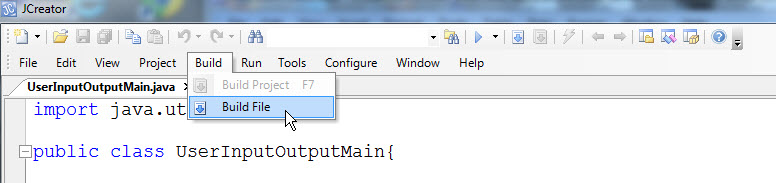
To compile this file select the Build/Build File menu item (Make sure the file you want to compile is the currently active tab showing the file contents).
Alternatively you can click the Build icon from the topmost toolbar as shown below.
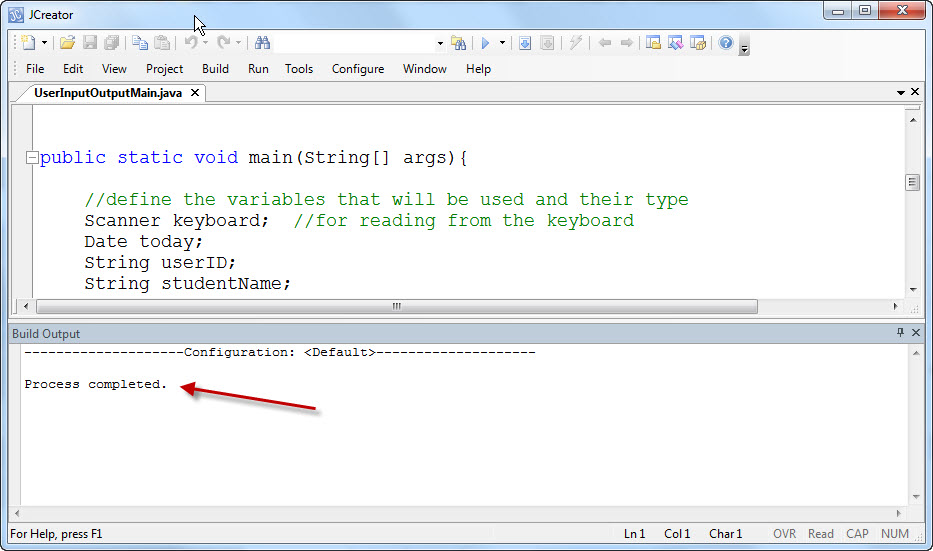
The lower pane of the console window should show the build progress when the file being compiled and show either error messages if there are problems with the code or show "Process completed" when the code has compiled:
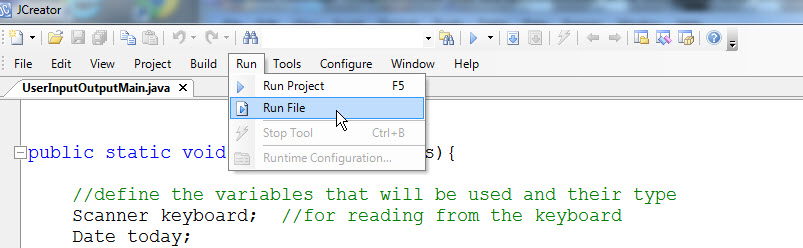
To run the code select Run/Run File as shown below.
Alternatively you can click on the Run icon from the upper tool bar:

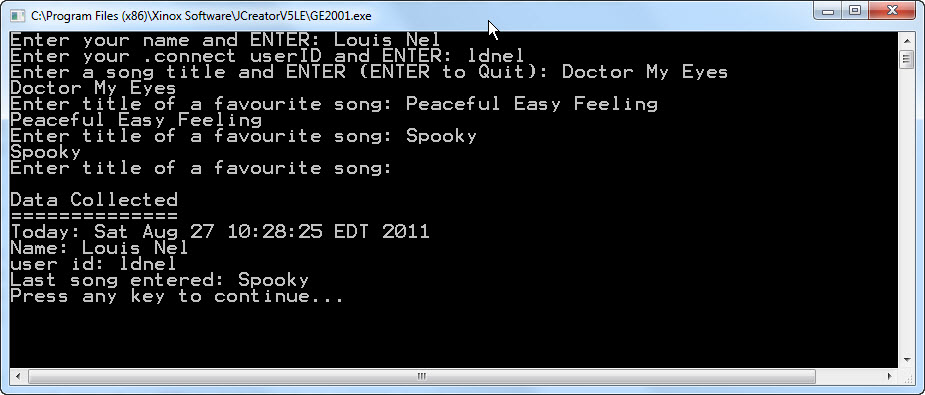
Below is the output DOS window that should open and show the behaviour of the program.
Note, depending on the options settings in JCreator, your input and output might appear in a JCreator Pane instead as shown below.
You can switch between these two options as follows. If you are using JCreator and you prefer to run your JCreator output in a separate DOS window then do the following. select Configure/Options from the menu bar. Select JDK Tools from the options. Then, on the pull-down box, select Run Application. Next, there will be a greyed out <Default> selection in the box below it. Click it once, then click the Edit button becomes active on the right. On the right-hand column, there will be a checkbox labelled Capture Output. Uncheck that, and you'll have a DOS/Command window for your input/output. Alternatively if Capture Output is checked the input/output will appear in a JCreator pane.
For the remainder of this tutorial we will show the DOS Command window in our screen captures.
Problem 1
Adding a Java Object
Instead of collecting user data in separate String variables we want to create a data object, of class Person, to contain the data.
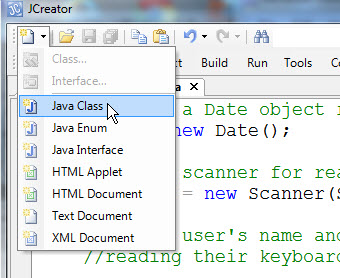
Click on the down arrow of the New File icon in the upper left of the JCreator tool bar as shown below, and select Java Class from the drop down menu.
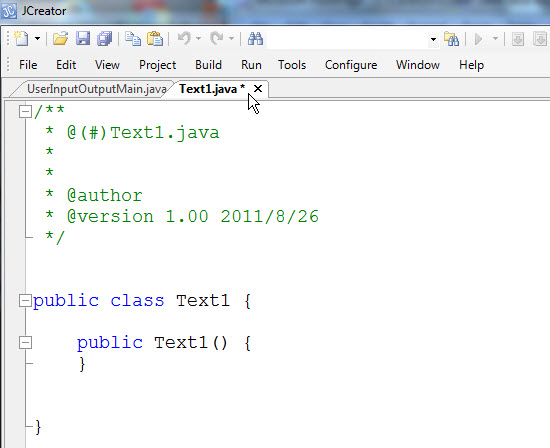
A new class file will be created with an automatically assigned name, maybe Text1.java, as shown below.
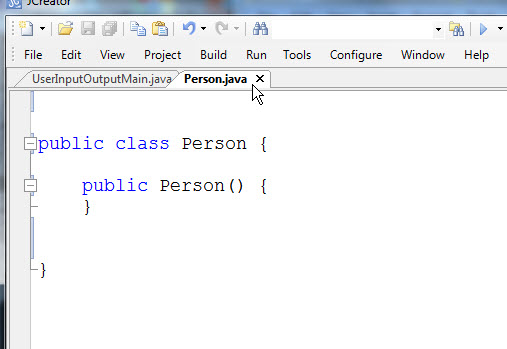
Edit the Text1.java, or whatever it's called, code by replacing it with the following. (You can delete the comments if you want) Then, using FILE/Save As, save the file under the name Person.java to the same directory as the UserInputOutputMain.java file. It is VERY IMPORTANT that the name of the .java file and the name of the class match exactly (Person in this case). Also make sure the Person.java file is in the same directory as the other, already supplied, .java files. After completing this you file should be as shown in the screen capture below.
}
}
Next we want to add variables to the Person class to represent a person's name and user id. Modify the Person class to look as follows:
public
class Person {
String name;
String userId;
public Person()
{
}
void print(){
System.out.println("Person:");
System.out.println("name: "
+ name + " userId: " + userId);
}
}
To test your Person
class for problem 1 use the Problem1Main.java
code. Examine this code. You will not need to modify this main code to
do the problem, all the code you write should be in your new Person class. Notice that the
variables String studentName and String userID in the previous main program
have been replaced with Person p = new
Person();. Also notice that the user input is assigned directly
to the data object's fields by the statements
p.name = keyboard.nextLine() and p.userId
= keyboard.nextLine();
Finally, notice that the //output the data collected part of the main program now invokes the Person object's print() method as below.
//output the data collected
System.out.println(""); //output a blank line
System.out.println("Data Collected");
System.out.println("==============");
System.out.println("Today: " + today);
p.print();
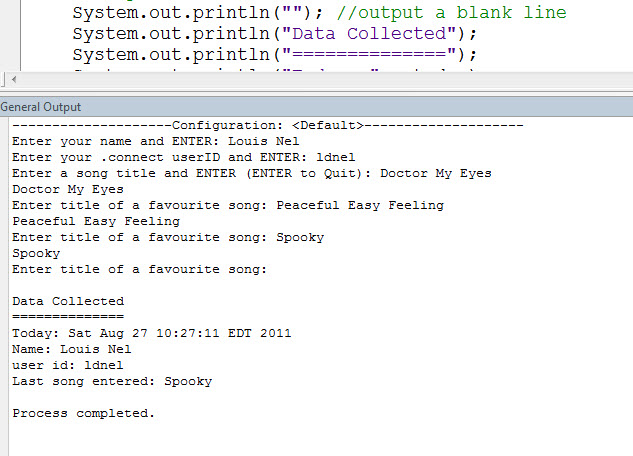
After completing your Person class for problem 1 the program output should look like the following. (Note: to run your code by clicking on the JCreator Run button make sure the Problem1Main file is the current tab, otherwise you will get an exception or the wrong main routine will run.)
Problem 2
Collecting Song Data in the Data Object.
Next we want to modify the Person class to also be able store the user's favourite songs. Add two new variables: int numberOfSongs and String[] songs to the Person class. That is, an array variable to store song titles in and a variable keep track of the number of songs that are currently in the songs array. You should initialize the numberOfSongs and songs variables in the Person(){...} constructor. (Initialize the songs array to be big enough to hold maybe 5 or 10 songs.) Note that numberOfSongs is meant to be the number of songs actually in the array, not the size of the array.
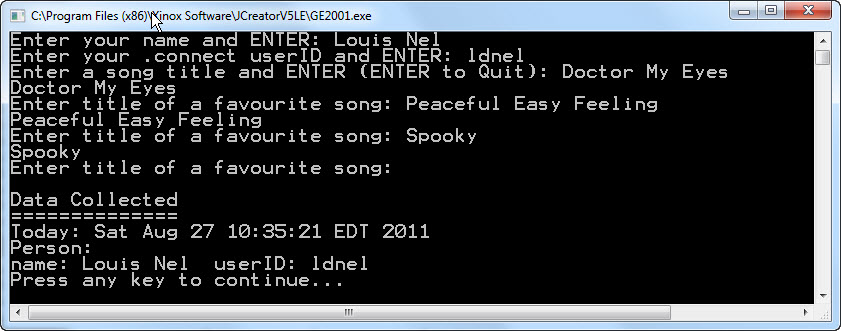
To test your code for problem 2 use the Problem2Main.java code. Examine this code. Notice that the fields p.numberOfSongs and p.songs are directly accessed from the main() procedure. Notice also that the print() method of class Person must be changed because it now prints the person's songs as well with the subtitle "Favourite Songs:". The print() method will have to loop through the songs array and print the song titles found there.
Again, to complete this problem you should not have to modify any of the code in Problem2Main.java. Moreover, your changes to the class Person should be "upwards compatible". That is, still allow Problem1Main.java code to run as before. After completing the code modification the behaviour should be as shown below. (Don't worry right now if you add more songs than the songs array can hold and your code blows up. We will fix that in the next problem.

Problem 3
An Object Method to Add Songs
You will have noticed in problem 2 that the main() procedure had to worry about where to put songs in the Person object's songs array. It would be much better if code in the Person class took care of this and also checked for overflow and duplicates. We want to create a void add(String aSongTitle){...} object method that can be called by any client code that wants to add songs to a Person object. Notice the Problem3Main.java code now simply adds songs that the user enters as follows.
while(!(input =
keyboard.nextLine().trim() ).isEmpty()){
p.add(input);
System.out.print("Enter title of a favourite song:
"); //prompt user
}
Write a void add(String aSongTitle) method that will add the song aSongTitle to the songs array and increment the numberOfSongs variable as required. In addition it should ensure that not more songs are added than there is room for. That is, if the songs array is already full then simply don't add additional songs. Lastly, the add() method should ensure that no duplicate songs are added. To do this it must loop though the songs already in the songs array and see if there is already a song with the same title as the one being added. To compare the String aSongTitle with a title in the songs array use a statement like:
if(aSongTitle.equals(songs[i])) {...}
When you want to compare strings to see if they contain the same characters (i.e. whether they are equal to each other) always use the string1.equals(string2) method as shown above. DO NOT use a comparison string1 == string2, that tests whether the string1 variable and string2 variable are referring to the same, identical, object. We are only interested in whether two string variables contain the same characters (are equal) not whether they refer to the same object (identical). In general, when working with objects, the x == y operator tests test whether object variables x and y refer to the same object, whereas x.equals(y) tests whether x and y are equivalent to each other in some sense. For strings equivalent mean that they contain the same characters in the same order; for bank accounts equivalent might mean they have the same amount of money in them. Equivalent means whatever the designer of the class wants it to mean.
To test your code for problem 3 use the Problem3Main.java code. The behaviour should be a shown below.

Once you have completed the three problems above, show your results to the tutorial TA to get credit for the tutorial.